Announcement

Collapse
No announcement yet.

61 Lark Convertible And The 7 Day (Un)Reality Build off

Collapse
X
 
  • Filter
  • Time
  • Show
Clear All
new posts

  • #16
    DAY 3.

    Originally posted by jlmccuan View Post
    Pretty fast to find out you need floor panels, order, receive them and then install them in one day.
    I know, It is amazing how special our Studebaker vendors are to have parts ready for the "Just In Time" work..

    I started to figure, I'm putting an R1 in this car, I may as well make it a "1961 Full Package Super Lark"

    Here is the lowly frame, with the production mark still viable. 3-L-6-A

    .
    .
    The miscellaneous suspension parts.

    .
    .
    Like Mr. Rogers I'm off to the to my local Studebaker Performance Shop (aka: The Magic Kingdom) for some traction bars.
    Welded in place.. And off to get powder coating.

    Since this was an original 6Cyl car, the Dana 27 was replaced with the Dana 44. Easy Swap Right?
    Q: What could possibly go wrong?
    A: ( Lets see some guesses)

    .
    .
    Fast forward to today as I pick up the frame and miscellaneous parts that were powder coated.
    The big tube in the background is the SS Tubing for the brake lines and fuel lines

    .
    .
    I also picked up the rear axle from the local gear shop. They specialize in Jeep Rock Crawlers and did a great job dialing in the lash on the gears.
    Yes, 3:31 gears with TwinTrac. Thanks to John.

    .
    .
    Lets get the bushings and the pivots in the A Frames!


    .
    .
    And On the frame!

    .
    .
    Center Pivot and test fit of PS Ram.

    .
    .
    Off to the rear side of the frame.
    All metal parts were zinc plated. Not original but no ruty parts here for a long while.
    New Bushings as well


    .
    .
    Cant forget the Bling!

    .
    .
    Traction Bars and Sway bars


    .
    .
    A few snags here and there and My boss called and asked when I was coming into work, so I'm worried I'm not going to get this to paint on time..
    .

    Comment


    • #17
      DAY 3 Continued

      On to more of the Engine..

      Roadrunner Converters rebuilt this V8 torque converter with a stall speed of 2200 RPM.. Lower right corner says Studebaker!


      Bell housing on and dialed in.. Rear pump to the transmission slid right in..


      .
      .
      looks good on the frame.. I'm thinking if it had Wings, It would fly..

      .
      .
      Some Tranny Work..
      I was told that i have the last front shaft carrier bearing for the BW transmission.. Also the Planetary rear baring as well.

      .
      .
      Transmission in, with new SS Lines for the cooler.

      .
      .
      Fitting the 2-1/4" exhaust for a X-Frame Convertible is a bit puzzeling..


      .
      .
      Trying to get all that I can before the body goes back on..


      .
      .
      Its ready for the Body Drop..
      As an UNINTENDED benifit of the Body cage I built, It makes it very nice to lower and adjust placement!
      WOW! What luck!


      ..
      .
      Some pictures from the bottom..
      .


      .
      .
      .
      .
      As you can see the Daylight has gone away for the day.. Ordered Pizza..
      Good night!

      Comment


      • #18
        Wow great work!! I love threads like this!

        Comment


        • #19
          WOW... What a project... my '53 coupe took several years & I don't know when I will get the pickup project running.
          Keep the postings going & I am sure Ann Turner would love to get these photos and a story for TURNING WHEELS.

          Comment


          • #20
            What brand truckliner spray did you use? This whole rebuild is a marvel of money, time, timing, enthusiasm, planning, friendship, skill, equipment and a wonderful goal!

            Comment


            • #21
              Originally posted by SweetSixtyn View Post
              What brand truckliner spray did you use? This whole rebuild is a marvel of money, time, timing, enthusiasm, planning, friendship, skill, equipment and a wonderful goal!
              Happy Father's Day!
              Bummer, I'm forced to rest..
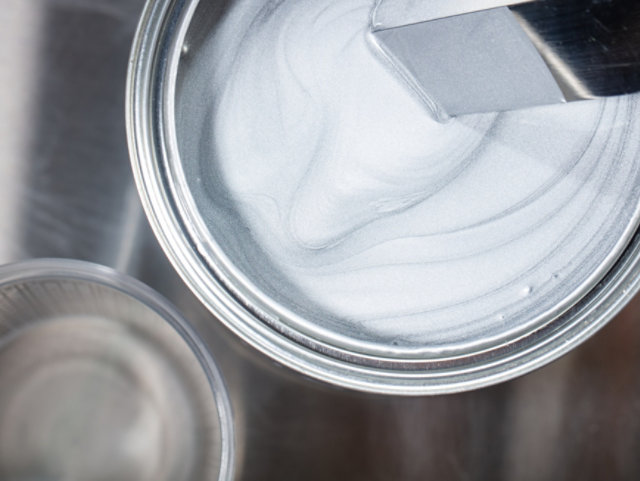
              But here is the Bed Liner I used

              It is there Finish 1 Tintable Bed Liner

              Sherwin-Williams Automotive Finishes is the leading manufacturer and distributer of high-quality paint and coating systems for automotive and fleet refinishing industries.


              Hope you enjoy the posting.

              Comment


              • #22
                DAY 4

                After a restful Father's Day and a 16oz Steak, time to get busy..

                Here are a few "before" picture of the body panels after media blast.
                The last photo is rust found on the rear of the right fender.
                With all this rust to contend to, how will this get done.
                .


                .
                .
                While that is being taken care of, its time to get the inside of the car with all the door jams and trunk..
                Media blast does not get everywhere or clean enough to paint so touch-up is required.

                .
                .


                .
                .
                Most Trunk's on larks are really over looked. Since this is a complete color transformation, I added a few touches to it.
                .
                I masked up around 2" from the bottom following the contour of the trunk floor

                .
                I then hit it with 3 coats of the bed liner.

                .
                .
                Some more single stage paint and....


                .
                .
                I think that is a

                I have to check on the Body panels..

                Comment


                • #23
                  How about a dollar receipt trail ???

                  Comment


                  • #24
                    I don't think his local police or his insurance would appreciate advertising the build cost. At least not according to my wife who has ten years experience in insurance. I do know media blasting and powder priming alone on my wife's '51 Chevy Suburban was $1600. I expect the build cost on this car could far outweigh the restored value. What will keep the cost under control is the considerable skills of the owner-builder and the availability of friends to help. As long as the ratio of beer and food doesn't outweigh the build progress!

                    Comment


                    • #25
                      DAY 4 Continued.

                      Originally posted by jackb View Post
                      How about a dollar receipt trail ???
                      Originally posted by SweetSixtyn View Post
                      I don't think his local police or his insurance would appreciate advertising the build cost. At least not according to my wife who has ten years experience in insurance. I do know media blasting and powder priming alone on my wife's '51 Chevy Suburban was $1600. I expect the build cost on this car could far outweigh the restored value. What will keep the cost under control is the considerable skills of the owner-builder and the availability of friends to help. As long as the ratio of beer and food doesn't outweigh the build progress!
                      I'll post some of the totals lastly. There are alternatives in cost when doing a project like this.
                      As you noted, using the help of ones skills, or friend, as opposed to a shop.

                      Even when using a shop there are big price differences in getting work done, so shop around.

                      One rule of thumb.. If the shop you take it to starts bragging they are the best in town, Run!

                      To the Body..

                      The holes for the trim have been welded up.
                      I'm going with the no trim look other that the belt molding and front and rear chrome.
                      I may get override by this decision, so the trim will be polished anyway.
                      All of the insides painted single stage.


                      .
                      .
                      Under the Hood and trunk

                      .
                      .
                      I had many parts Gold Zinc plated.. this is one part you should never have plated. It is a body J-nut. Its made out of a spring steal.
                      When you plate spring steal, it becomes brittle..

                      .
                      To reattach the rear quarter panels I used this 3M product.


                      According to the product sheet, it says working time is 15 min! When 3M says 15 min, its more like 12 min when in Phoenix on a cool afternoon (102F).

                      I had my son start a countdown timer on my cell phone for 7min 30Sec. and another for 7min 30sec.

                      The first time will tell me when I have to have all the sealer on the body. The second is my work time end time.

                      I wished I had my son taken video of it because it was like a choreographed dance move.
                      I actually practiced how to slide the lower part of the quarter panel in its slot and which bolts to screw in and what order.

                      If you look at the right side of this picture, there is the seal gap between the inside wheel tub and the car. In the picture it is covered in green and blue tape.

                      It is about a 1/2 inch wide track I have to fill enough to seal the inside to the out side of the car.


                      Sorry for the lack of pictures during the assembly, as the limited dry time kept from actively taking photos..
                      Here it sits with Front fenders and rear quarter panels and remembrance of its old Flamingo Color..


                      Time for children's piano lessons..

                      Comment


                      • #26
                        Originally posted by Jerry Forrester View Post
                        Maybe he made his own floor patch panels. I know I do, with all the correct stiffening beads.

                        BTW Jim, do you have my valve covers that Kent Fedor placed in Jim Turner's booth at York?
                        Yes, Jerry, I have them.
                        Jim
                        Often in error, never in doubt
                        http://rabidsnailracing.blogspot.com/

                        ____1966 Avanti II RQA 0088_______________1963 Avanti R2 63R3152____________http://rabidsnailracing.blogspot.com/

                        Comment


                        • #27
                          Wow to a straight clean vehicle to start with ... SW car !!!
                          Wow to neighbors and an HOA who let such a build happen [ bet that cost a Dr. Pepper or two] !!!
                          Wow to a home shop with tools I dream of !!!
                          Wow to a guy who obviously knows Studes, tools and how to use them !!!
                          Wow to the helpers and suppliers who came through with parts !!!
                          Wow to a great job and the photo's to back it up !!!

                          Comment


                          • #28
                            DAY 5

                            Originally posted by mmagic View Post
                            ... !
                            Wow to neighbors and an HOA who let such a build happen [ bet that cost a Dr. Pepper or two] !!!
                            Well let's just say the HOA and I have had words..Lucky in AZ, if the HOA is not gated, then many of the strict rules are not enforceable.
                            But as you said...
                            Wow, Neighbors that put up with your hobby..

                            To that here is a funny story.

                            A buddy of mine, Scott, stops by with his 70's Bronco, lifted, headers, pipes..
                            We were swapping out his power steering pump. Scott sees one of my neighbors walking over. Scott say, "UhOh, here comes a neighbor."
                            I reply, "he's probably is going to wonder how you got in line before him.."
                            Sure enough, Dave, my neighbor said, "I thought my truck was next.."
                            Then another neighbor came over, John.. not StudeJohn, and said basically the same thing, only about his BMW.
                            When the neighbors left, Scott stood there sort of speechless and said, "is this an episode of Twilight Zone or something..

                            Don't worry, Dave and john's vehicles are running just fine.

                            Rims painted..


                            .
                            .
                            Hood and trunk on, Body being aligned, primed and blocked


                            .
                            .
                            Tires on.. And she is off to paint


                            (852)
                            Last edited by SScopelli; 06-17-2014, 08:13 AM.

                            Comment


                            • #29
                              Please tell me that this was a 3 year restoration, and you saved up all the pictures to roll out to us over 1 week.
                              I spent 13 years redoing one Studebaker - having huge feelings of inadequacy here....

                              Comment


                              • #30
                                DAY 5 Continued

                                Took these picture from the Paint Shop after lunch..

                                They will start to do the final block out and then seal coat it. Wow these guys are awesome to work through the night to get it done..
                                For that Mad Max Look, i was thinking of just taking home like this...
                                .

                                .
                                Short one. NOW I know what it feels like to watch paint dry..


                                .
                                .
                                No resting..
                                The top mechanism needed some attention. As noted the bushings were worn as well as cracked up!
                                Disassembled while numbering the bushings and taking pictures..


                                .
                                .
                                Some pivots were bolted in, others Riveted and had to be ground off to remove..

                                .
                                .
                                Since SI does not have the nylon bushings or the Rivets, I had them custom made, The shoulder rivets are now shoulder bolts.
                                The nylon bushings are now Duralon, which is a carbon fiber impregnated plastic..

                                .
                                .
                                Top Assembled..

                                Last edited by SScopelli; 06-17-2014, 02:10 PM.

                                Comment

                                Working...
                                X