Announcement

Collapse
No announcement yet.

Just Finished Installing Adjustable Traction Bars!

Collapse
X
 
  • Filter
  • Time
  • Show
Clear All
new posts

  • Just Finished Installing Adjustable Traction Bars!

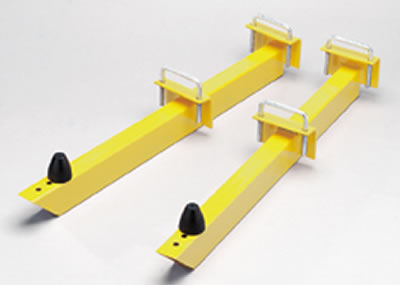
    Here are the steps I took to install my Adjustable Traction Bars in the '64 Hawk

    I borrowed Roly Lusted's Hub and his Axle puller. He and Barry Leppan came over to check a few things out on the Hawk for Barry's '64 Hawk build-up.

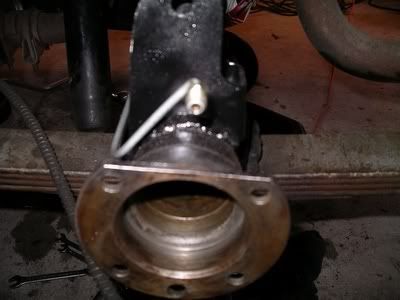
    My first step was to position and Welded the Differential Mount on the Dana 44 Twin Traction perpendicular to the yoke.


    I then put temporarally installed the traction bar to locate the bracket on the frame then Wire brushed and cleaned the frame.


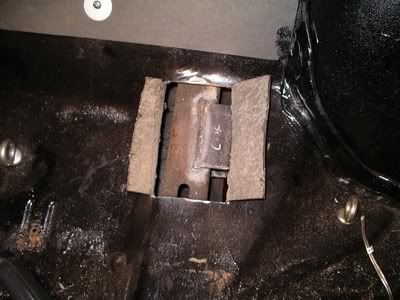
    I then cut a hole in the rear passinger floor and folded back the metal, Cleaned the frame and tacked the C-K mount to the frame.


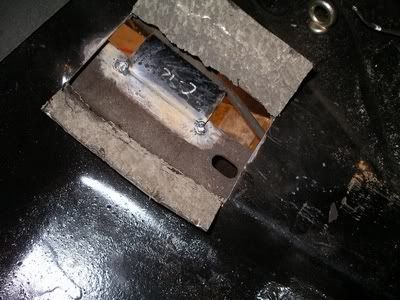
    I tacked the C-K mount to the frame in the wheel well.


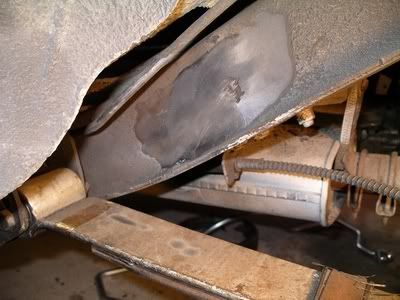
    I welded the Bracket in the rear seat and in the wheel well


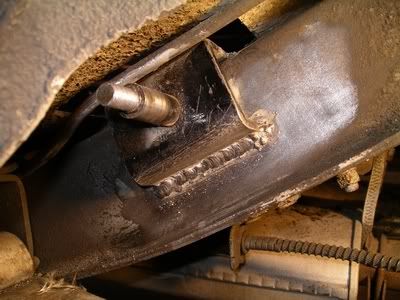
    This was a tough weld with little room to make it nice. The other side looks better!

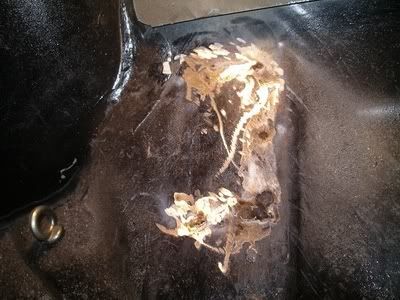
    I folded the metal flaps back in the rear seat area and welded the flaps back in place.


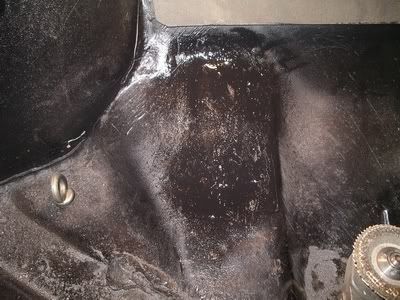
    Painted up the rear seat area and made it look like it never happened


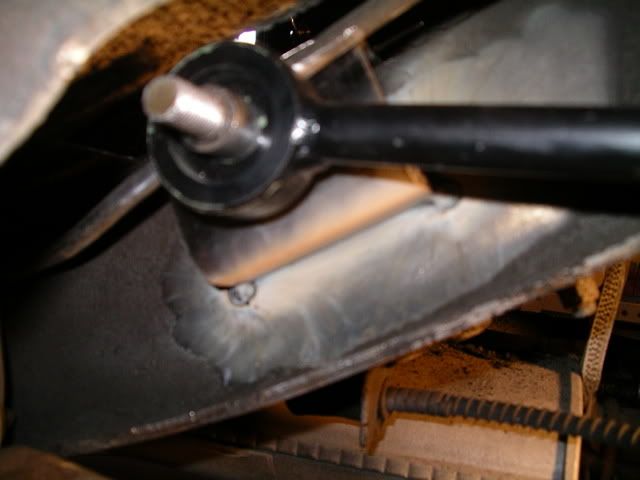
    I painted the mount and installed the adjustable traction bar


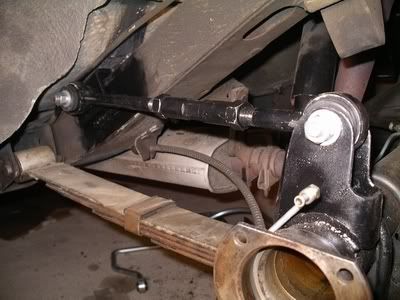
    Now to install the flanged axles, rear sway bar and redo the brakes!

    1964 GT Hawk soon to be R2 Clone
    1964 GT Hawk
    PSMCDR 2014
    Best time: 14.473 sec. 96.57 MPH quarter mile
    PSMCDR 2013
    Best time: 14.654 sec. 94.53 MPH quarter

    Victoria, Canada

  • #2
    I would sure like to see some similar type pictures when you install the flanged axles. I've been considering doing this, but not sure
    how difficult it would be.
    Thanks for these pictures.

    Comment


    • #3
      One question..
      Did you 'skip weld' and alternate sides when welding on those upper brackets to the differential housing?
      Jeff[8D]


      DEEPNHOCK at Gmail.com
      Brooklet, Georgia
      '37 Coupe Express (never ending project)
      '37 Coupe Express Trailer (project)
      '61 Hawk (project)
      http://community.webshots.com/user/deepnhock

      [COLOR=#000080][B]HTIH (Hope The Info Helps)

      Jeff[/B][/COLOR] [IMG]http://forum.studebakerdriversclub.com/images/icons/icon6.png[/IMG]

      [I][B]Get your facts first, and then you can distort them as much as you please. [/B][/I][B][COLOR=#000080][/COLOR][COLOR=#000080][FONT=Times New Roman][SIZE=3]Mark Twain
      [/SIZE][/FONT][/COLOR][/B]
      [IMG]https://farm5.staticflickr.com/4285/34900491234_7aa7c4d046_m.jpg[/IMG][IMG]https://farm5.staticflickr.com/4032/35610707391_efd4ca9c8f_m.jpg[/IMG][IMG]http://www.racingstudebakers.com/avatar_01.jpg[/IMG]

      Note: SDC# 070190 (and earlier...)

      Comment


      • #4
        Jeff, I tacked the differential bracket into place front,rear and inner and outer, then passed four 1/2" beads on outer and inner portions of the bracket. Then passed a bead in-between the two 1/2" beads. I then did a final top pass insuring to tie the bracket and differential to one another. Since the differential was supported by the axle stands I did not pass a bead where the outer U-bolt ties the differential to the leaf spring. The differential bracket is tight to the U-bolt. I checked the differential tube for penetration expecting possible flaking of the metal. You could see only the heat transfer. My concern was passing a strong weld but not to overheat the tube but insure the bracket will never break off under fast acceleration.

        1964 GT Hawk soon to be R2 Clone
        1964 GT Hawk
        PSMCDR 2014
        Best time: 14.473 sec. 96.57 MPH quarter mile
        PSMCDR 2013
        Best time: 14.654 sec. 94.53 MPH quarter

        Victoria, Canada

        Comment


        • #5
          Nice "how to" description and set of photos.

          Did you start with a stock (repoped) traction bar kit?

          Did you modify the bars themselves or fab new ones?

          What is the purpose of the adjustable feature?

          How do you keep the axle tubes from warping during the welding process?


          Dick Steinkamp
          Bellingham, WA

          Comment


          • #6
            Dick,

            I purchased these adjustable traction bars from Fairborn Studebaker. I believe Phil Harris has had these made. The purpose of adjustable traction bars are to change the pinion angle from 2 degrees down to a increased pinion angle. I may find wheel hop a problem with my new R2 engine (Built by Nimesh Solanki)under hard acceleration. If it is problem I could dial the pinion angle down to compensate the pinion travel and increase traction to the wheels. When welding the bracket I found the heat was not a problem (but was concerned) when welding the tubes. My reply to Jeff described how I avoided any warping of the differential tube. It will be my intention to take my Hawk to the PSMCDR in Michigan next year '08, support the Racing Studebaker Team and have some fun at the track.- Allen

            1964 GT Hawk soon to be R2 Clone
            1964 GT Hawk
            PSMCDR 2014
            Best time: 14.473 sec. 96.57 MPH quarter mile
            PSMCDR 2013
            Best time: 14.654 sec. 94.53 MPH quarter

            Victoria, Canada

            Comment


            • #7
              Allen, just a note on pinion angle altering.

              While an adjustable bar has merits, using it to change the pinion angle shouldn't be one of them. You should use the tapered shims made for doing this. They go between the spring and axle mounting pad.
              Putting everything in a bind by trying to twist the spring with the bar will not give good or repeatable results. The car will react a little different each launch.
              If you do this, this way, take care in watching for cracks at "all" mounting points...both welded and bolted.

              Mike

              Comment


              • #8
                quote:Originally posted by Mike Van Veghten
                While an adjustable bar has merits, using it to change the pinion angle shouldn't be one of them.
                What are the merits, Mike?


                Dick Steinkamp
                Bellingham, WA

                Comment


                • #9
                  Will this mod be allowed at the PSMCDs? I sure hope so...

                  StudeDave [8D]
                  V/P San Diego County SDC
                  San Diego, Ca


                  '54 Commander 4dr 'Ruby'
                  '57 Parkview (it's a 2dr wagon...) 'Betsy'
                  '57 Commander 2dr 'Baby'
                  '57 Champion 2dr 'Jewel'
                  '58 Packard sedan 'Cleo'
                  '65 Cruiser 'Sweet Pea'
                  [b][FONT="Comic Sans MS"][SIZE="4"] [COLOR="green"]StudeDave '57[/COLOR] [/SIZE] [url=http://www.blueislandsdiving.com][img]http://serve.mysmiley.net/characters/character0007.gif[/img][/url] [SIZE="3"][/SIZE] [/FONT]
                  [COLOR="#2F4F4F"]US Navy (retired)

                  3rd Generation Stude owner/driver
                  SDC Member since 1985

                  past President
                  Whatcom County Chapter SDC
                  San Diego Chapter SDC

                  past Vice President
                  San Diego Chapter SDC
                  North Florida Chapter SDC [/COLOR][/b]

                  Comment


                  • #10
                    I concur with the other comments, use wedges to set the pinion angle, THEN adjust the traction bars.

                    I have no idea if this would be allowed at the PSMCDs or not.

                    nate

                    (who has a set of trac bars to weld in, himself, but is too chicken to weld on his axle tubes)

                    --
                    55 Commander Starlight
                    --
                    55 Commander Starlight
                    http://members.cox.net/njnagel

                    Comment


                    • #11
                      The axle tubes were not the problem, I had the rectangular bracket on the frame rip the frame out.

                      Comment


                      • #12
                        quote:Originally posted by Alan

                        The axle tubes were not the problem, I had the rectangular bracket on the frame rip the frame out.
                        How about slapper bars?


                        Dick Steinkamp
                        Bellingham, WA

                        Comment


                        • #13
                          Greetings, studebakerR2-4-me,

                          Let us hope you have better luck with this style bar than Alan and I have had. Having the bracket cantilevered off the frame gives the axle rotation leverage to pull it off.

                          The only attaching method which worked well for me was drilling 1/2" holes through the frame, using a 1/2" diameter x 6" long grade 8 bolt, with a 1 1/2" thick x 1 1/2" diameter solid spacer over it welded to the frame.

                          My experience with the overaxle bars was fair for drag use, very good for controlling brake hop, and quite a bit of ride stiffness. Mine were solid 1' square bars with big truck shock eye bushings for the ends. They also stiffened the roll and acted much like an anti roll bar. Please let us know how your setup works for you.

                          thnx, jv.

                          PackardV8
                          PackardV8

                          Comment

                          Working...
                          X