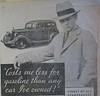
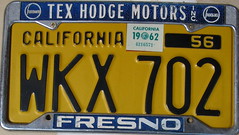
Hey guys. I just acquired a new baby. She's been in a barn since 1973 and needs some love. It was a single family car until I purchased her. To my surprise, I charged the battery and she fired right up. Since bringing her home on the trailer, I changed the plugs, drained and refilled the oil (using Lucas Oil 20W-50 Petroleum Oil with the zinc additive), one new plug wire connector, rebuilt wheel cylinders, flushed the brake lines, one new line, new tires, and she is on the road. This at least lets me drive her around and feel out some kinks. 
I ordered a new carb kit for the old Carter WE and I am stripping the oil bath and repainting it while everything is off. While I'm waiting on the carb kit, I'm soaking the carb in pieces in some Metal Rescue to take her back to new raw metal.
The emblem was shot. Lots of oxidation. I didn't take a picture before I started, but here is one like it was:

I started by soaking it in ketchup:

That got it down to raw brass:

Then I polished it with some 0000 steel wire:

After I got it polished, I painted it with basic modeling enamel paint:

Once that sat for about 20 minutes, I shot it with 3 coats of crystal clear enamel spray, waiting 15 minutes between coats:

After that, I baked it for about 20 minutes on 200:

Now that I've done it once, I may do it again down the road and do a little better job. I'm fairly happy with the results for now though:

Next is the carb and the oil bath.
I ordered a new carb kit for the old Carter WE and I am stripping the oil bath and repainting it while everything is off. While I'm waiting on the carb kit, I'm soaking the carb in pieces in some Metal Rescue to take her back to new raw metal.
The emblem was shot. Lots of oxidation. I didn't take a picture before I started, but here is one like it was:
I started by soaking it in ketchup:
That got it down to raw brass:
Then I polished it with some 0000 steel wire:
After I got it polished, I painted it with basic modeling enamel paint:
Once that sat for about 20 minutes, I shot it with 3 coats of crystal clear enamel spray, waiting 15 minutes between coats:
After that, I baked it for about 20 minutes on 200:
Now that I've done it once, I may do it again down the road and do a little better job. I'm fairly happy with the results for now though:
Next is the carb and the oil bath.


Comment