A while back a few of us on the forum were discussing how to add power windows to a K-body Stude.
The best suggestions were to either use the custom made units that are designed to fit the existing windows, minus the manual gear, or to add the type that have an adapter to power the existing manual crank assembly by driving the original crank shaft.
The custom units look great but being a CASO, I thought I'd try to do it cheaper.
The type that drive the original crank struck me as having a weak point in the plastic adapter that accepts the drive.
I first looked at the less expensive generic after market units that replace the mechanical drive.
The problem with these units is the shallow depth of the K-body doors. The lift required (14+ inches) did not allow the motor to locate below the lift. The after market units that have the motor off to the side did not have enough lift. These units are also pricey if you want to buy quality units.
After cruising the wrecking yards and lurking on Ebay, I finally found a unit that appeared to be a possibility.
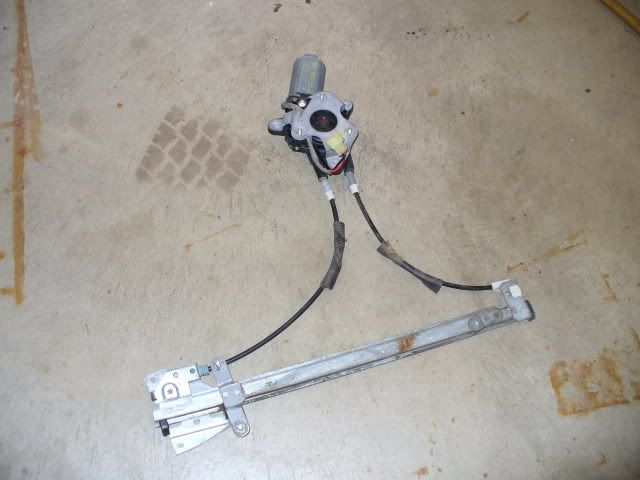
They are a circa 1995 Mazda 626 front door power lift as shown below. The only modification necessary was the track had a slight curve which was easily removed by just using the vise jaws and some gentle persuation. The drive cable tension did not change, the tension system must be designed to take up small changes.
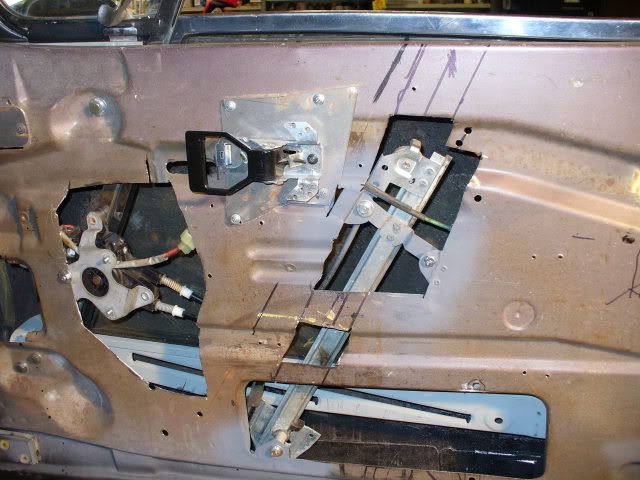
VIEWER ALERT!!!!! Some Studebaker sheet metal was sacrificed during this install.
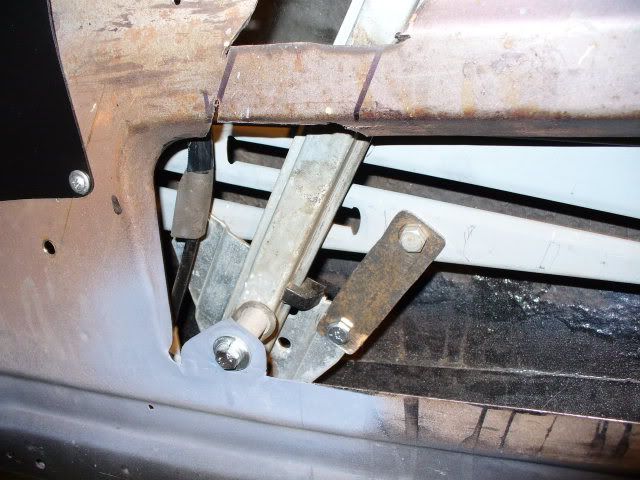
This is the unit installed in the door before the replacement panels were installed and final fitting was done.
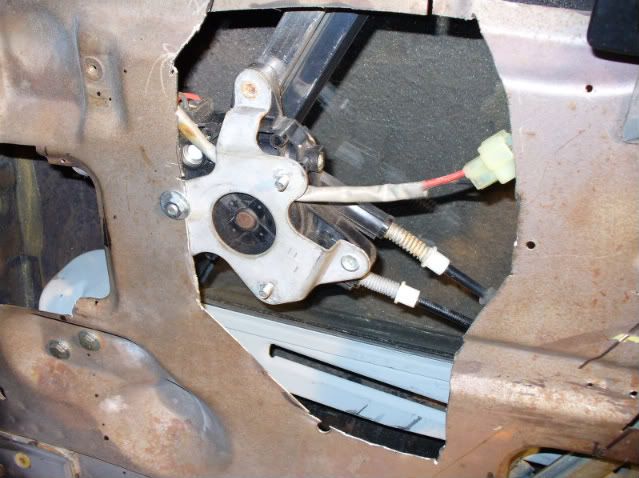
The motor is just thin enough to mount to the door in this position and let the window pass.
The track mounting was trial and error by attaching the unit to the window frame and fitting in the door. It took several minor adjustments to get the track positioned at the top and bottom of the travel. But this is what I ended up with.
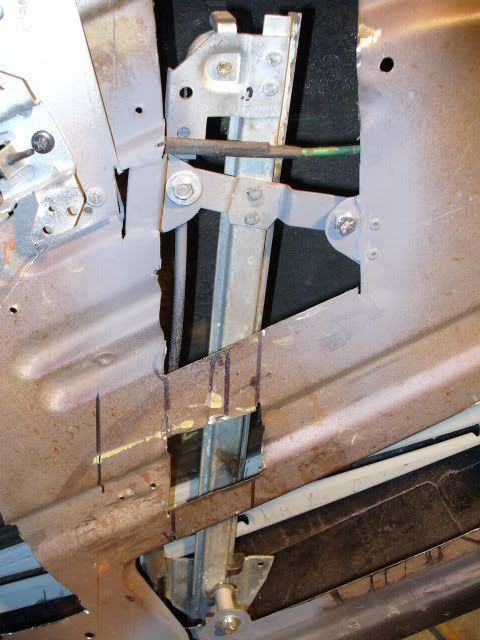
The final attachment may not be pretty but the window move smoothly in both directions.
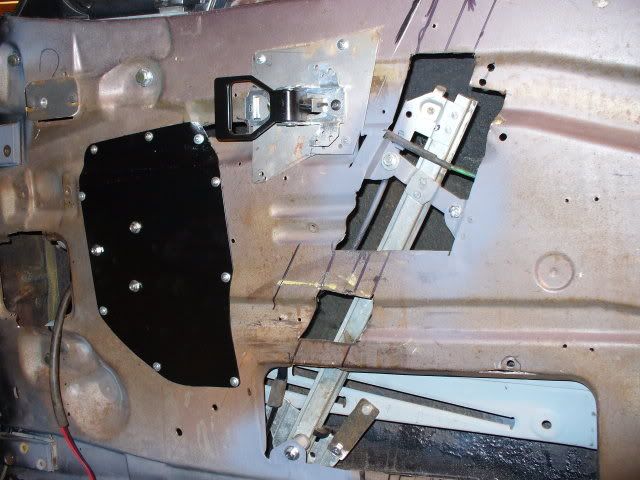
This is how the final install looks now. I'll add more cover plates when I get to finishing the door and clean up some of the other loose ends.
Hope this will help anyone else that would like to attempt this modification.
I have less that $60 in the total install for both doors. Of course the drives and motors are from Ebay and the rest is under $15 in sheet metal and bolts. Just a note-The drives use #8 metric bolts.
I'd like anyone that has any suggestions on improvements speak up. Please!
Bob
The best suggestions were to either use the custom made units that are designed to fit the existing windows, minus the manual gear, or to add the type that have an adapter to power the existing manual crank assembly by driving the original crank shaft.
The custom units look great but being a CASO, I thought I'd try to do it cheaper.
The type that drive the original crank struck me as having a weak point in the plastic adapter that accepts the drive.
I first looked at the less expensive generic after market units that replace the mechanical drive.
The problem with these units is the shallow depth of the K-body doors. The lift required (14+ inches) did not allow the motor to locate below the lift. The after market units that have the motor off to the side did not have enough lift. These units are also pricey if you want to buy quality units.
After cruising the wrecking yards and lurking on Ebay, I finally found a unit that appeared to be a possibility.
They are a circa 1995 Mazda 626 front door power lift as shown below. The only modification necessary was the track had a slight curve which was easily removed by just using the vise jaws and some gentle persuation. The drive cable tension did not change, the tension system must be designed to take up small changes.
VIEWER ALERT!!!!! Some Studebaker sheet metal was sacrificed during this install.
This is the unit installed in the door before the replacement panels were installed and final fitting was done.
The motor is just thin enough to mount to the door in this position and let the window pass.
The track mounting was trial and error by attaching the unit to the window frame and fitting in the door. It took several minor adjustments to get the track positioned at the top and bottom of the travel. But this is what I ended up with.
The final attachment may not be pretty but the window move smoothly in both directions.
This is how the final install looks now. I'll add more cover plates when I get to finishing the door and clean up some of the other loose ends.
Hope this will help anyone else that would like to attempt this modification.
I have less that $60 in the total install for both doors. Of course the drives and motors are from Ebay and the rest is under $15 in sheet metal and bolts. Just a note-The drives use #8 metric bolts.
I'd like anyone that has any suggestions on improvements speak up. Please!
Bob

 )]
)] '33 Rockne 10, '51 Commander Starlight, '53 Commander Starlight


Comment