Announcement

Collapse
No announcement yet.

My Half A$$ Studebaker Rebuild

Collapse
X
 
  • Filter
  • Time
  • Show
Clear All
new posts

  • Thanks for the info Robert. Great to have the resources of the SDC Forum. I am learning a lot here.
    "Man plans, God laughs".

    Anon

    Comment


    • Lot's of suggestion about springs and I may as well replace them while I can. CC655's not being made I may have to go with the Precision's. Here is the part number to my springs.

      Click image for larger version

Name:	P7010833.jpg
Views:	1
Size:	92.6 KB
ID:	1728619

      Click image for larger version

Name:	P7010832.jpg
Views:	1
Size:	106.1 KB
ID:	1728620

      Standard coils. I'll be spending this week cleaning the front end parts and getting a parts list together.
      "Man plans, God laughs".

      Anon

      Comment


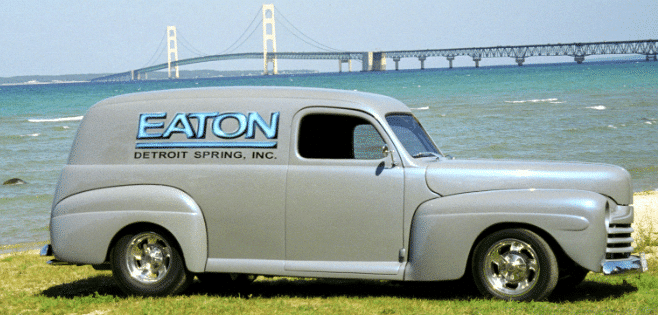
      • Did you check out Eaton Springs?
        Select the Year, Make, Model, Body Style, and Engine Size of your ride below. Help Ordering Online If you cannot find your springs in the parts lookup below, call us during office hours at 1 (313) 963-3839. Alternatively, fill out this form completely to request a quote from our sales team.

        Comment


        • Originally posted by creegster View Post
          Did you check out Eaton Springs?
          https://www.eatondetroitspring.com/findmyvehicle/

          Thanks, I just submitted a request.
          "Man plans, God laughs".

          Anon

          Comment


          • Well, the new header pipes came.


            Click image for larger version

Name:	P7020834.jpg
Views:	1
Size:	188.4 KB
ID:	1728638

            Looks like he reconfigured the pipe that probably had the same bends the previous pipe had. New one is on the left.

            Click image for larger version

Name:	P7020837.jpg
Views:	1
Size:	197.1 KB
ID:	1728639

            The pipe on top is a new one also for the right side.

            Click image for larger version

Name:	P7020839.jpg
Views:	1
Size:	135.7 KB
ID:	1728640

            This new left pipe now clears like it should although the "modification" seemed a bit extreme.

            Click image for larger version

Name:	P7020846.jpg
Views:	1
Size:	111.2 KB
ID:	1728641

            Looks pretty good now. Just waiting for my clamps to secure the pipes. Loosely installed for now.

            Click image for larger version

Name:	P7020850.jpg
Views:	1
Size:	76.3 KB
ID:	1728642

            I can see why that little bracket I asked about is so important.

            Click image for larger version

Name:	P7020852.jpg
Views:	1
Size:	78.2 KB
ID:	1728643

            I bought new battery cables since the positive was short with the new battery. I was surprised they were actually made in the USA!


            I got anxious and yes, there are multiple exhaust leaks. But it'a alive!

            - - - Updated - - -

            "Man plans, God laughs".

            Anon

            Comment


            • Good deal, glad the new pipe worked out.

              Avanti, Bob

              Comment


              • I received another delivery yesterday.

                Click image for larger version

Name:	P7030832.jpg
Views:	1
Size:	103.9 KB
ID:	1728657

                Eastwood panel separators, undercoat and a cool tool for the air chisel. You use the air chisel to act as an impact hammer and the tool has screwdriver bits and a turning handle. I think this will help with the door hinge mounting screws. Undercoating, for when I weld in the trunk panels and floors. The socket holder was just enough to push my order enough for free shipping.

                Click image for larger version

Name:	P7030833.jpg
Views:	1
Size:	91.5 KB
ID:	1728658

                I added the brake hose bracket as Paul had mentioned so the hose now clears the exhaust. Thanks Paul!
                "Man plans, God laughs".

                Anon

                Comment


                • I do have a question on the manual wiring diagram. Who has eyes good enough to even read and follow the wiring? Certainly not me. I am thinking of going to Kinko's to have this thing blown up to poster size. Then use color high lighters to even see where the spaghetti goes. Any suggestion? Also, there is a red wire that appears to go to the ignition switch. I used my remote starter to add power to see what lights up and what looks like the high beam indicator came on. Not much else. The wire did warm up more than I like. Any ideas? I'll take a picture of it today.
                  "Man plans, God laughs".

                  Anon

                  Comment


                  • This may help a little, click it a few times, it gets bigger.
                    Click image for larger version

Name:	62-hawk-wire diagram 2x size FULL COLORED 10-5-15   5-9-16   3-2-2019.jpg
Views:	1
Size:	168.6 KB
ID:	1728659

                    Comment


                    • Originally posted by bensherb View Post
                      This may help a little, click it a few times, it gets bigger.
                      [ATTACH=CONFIG]82252[/ATTACH]

                      Thanks, that helps. BTW Happy 4th f July everyone!
                      "Man plans, God laughs".

                      Anon

                      Comment


                      • Originally posted by Topper2011 View Post
                        I think this will help with the door hinge mounting screws.
                        Yeah, you'll be able to twist those screw heads off much easier with that tool. LOL.
                        Jerry Forrester
                        Forrester's Chrome
                        Douglasville, Georgia

                        See all of Buttercup's pictures at https://imgur.com/a/tBjGzTk

                        Comment


                        • Originally posted by Topper2011 View Post
                          Thanks, that helps. BTW Happy 4th f July everyone!
                          I just noticed that particular wiring diagram includes a few items I added to my car. Here's a colorized version of the original "unenhanced" diagram.

                          Click image for larger version

Name:	62-hawk-wire diagram 2x size FULL COLORED 10-5-15.jpg
Views:	1
Size:	154.4 KB
ID:	1728674

                          Comment


                          • Originally posted by Jerry Forrester View Post
                            Yeah, you'll be able to twist those screw heads off much easier with that tool. LOL.

                            That would allow the door to come off at any rate.
                            "Man plans, God laughs".

                            Anon

                            Comment


                            • More parts came in.

                              Click image for larger version

Name:	P7050832.jpg
Views:	1
Size:	79.5 KB
ID:	1728677

                              Maybe I can finally install the exhaust.

                              Click image for larger version

Name:	P7050835.jpg
Views:	1
Size:	76.4 KB
ID:	1728678

                              The exhaust wasn't fitting quite right. Plus I still had to install the batwing I had painted so long ago. It was then that I realized I had the intermediate pipes on incorrectly. Glad I didn't try to clamp it down the way I had it.

                              Click image for larger version

Name:	P7050839.jpg
Views:	1
Size:	75.9 KB
ID:	1728679

                              Fits a lot better now, but takes a LOT of fiddling to make sure it clears everything. I am very surprised by how little support the exhaust had. Only the flange of the header pipe and two hangers at the very back of the muffler and tailpipe. I may add some extra support at the bell housing to the end of the header pipe since that's a lot of weight on the flange. For now, I'm going to watch 5 hours of Tour De France.
                              Last edited by Topper2011; 07-06-2019, 05:57 AM.
                              "Man plans, God laughs".

                              Anon

                              Comment


                              • Exhaust pretty much in and I need to get some smaller clamps for the tail pipes, they are 1 3/4" and clamp to the hangers. The hangers need replacing and the ones I have won't work. Off to O'Reilly's again.

                                Click image for larger version

Name:	P7060832.jpg
Views:	1
Size:	104.1 KB
ID:	1728689

                                I did install the rear shocks though. Sad news as I was running the car, it seemed to have a miss on the right bank. Checked the plugs and the compression 125lbs. each, except #2, it has zero. A good time to stop for the day. Hope it's just a valve adjustment.
                                "Man plans, God laughs".

                                Anon

                                Comment

                                Working...
                                X