UPDATE per picture location change - 3/14/09
I got an email today asking me where I got the bracket to install the
GM alternator on my R1 Avanti. I figure I might as well post the info
here for all to benefit.
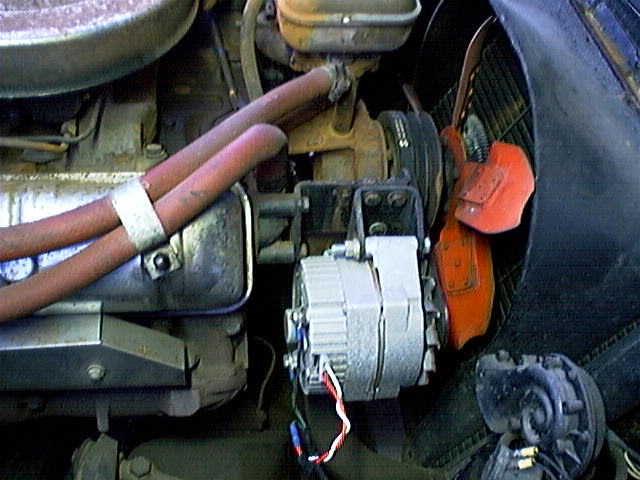
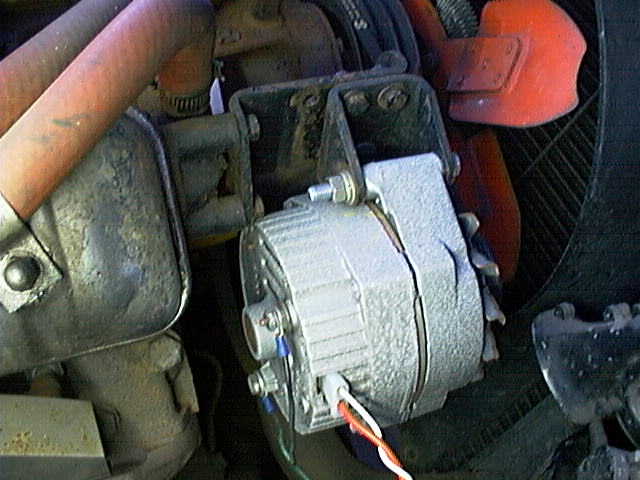
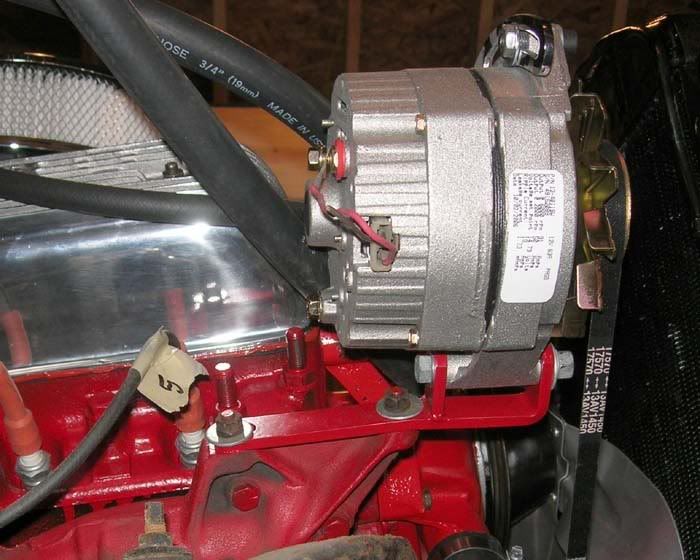
The install was simple, I used a standard three wire GM alternator, it
gets mounted upside down (the alternator wont care). I had to redrill
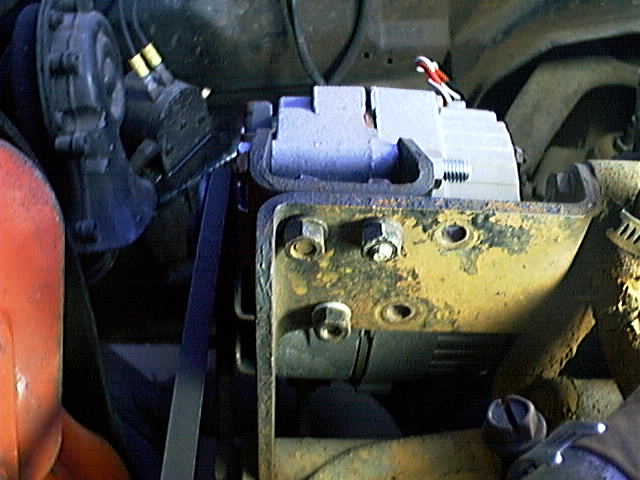
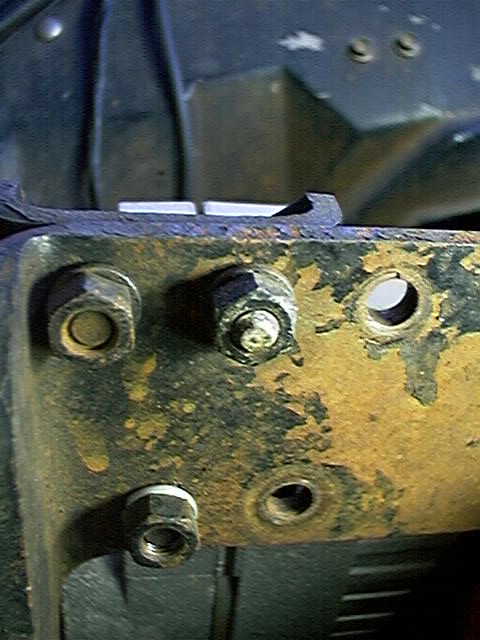
two holes, the R1 bracket is two pieces. I unbolted the 3 bolts that
hold the small bracket to the large bracket, and moved the bracket to
the front. Basically the front hole becomes the rear hole. Than I
drilled two holes the same size as the others and remounted the small
bracket in the forward pattern. I dont recall having to bend the arm
on the bottom, but the pulley should live up fine in this location. I
think the wiring details were on Bob Johnstone's, but the Honda alt
page has been redone, and my old GM alternator tech is now gone. Bob
you still have that somewhere? Here are pictures :


Tom
'63 Avanti, zinc plated drilled & slotted 03 Mustang Cobra 13" front disc/98 GT rear brakes, 03 Cobra 17" wheels, GM alt, 97 Z28 leather seats, soon: 97 Z28 T-56 6-spd, Ported heads w/SST full flow valves, 'R3' 276 cam, Edelbrock AFB Carb, GM HEI distributor, 8.8mm plug wires
I got an email today asking me where I got the bracket to install the
GM alternator on my R1 Avanti. I figure I might as well post the info
here for all to benefit.
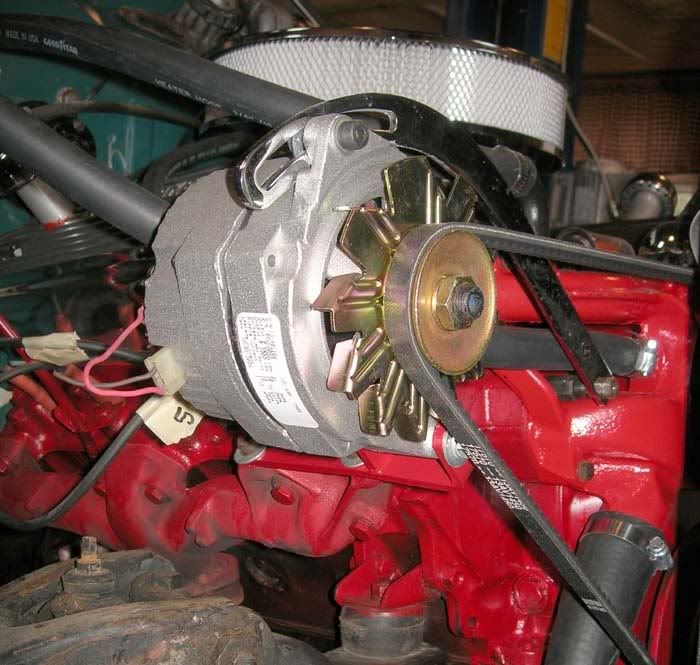
The install was simple, I used a standard three wire GM alternator, it
gets mounted upside down (the alternator wont care). I had to redrill
two holes, the R1 bracket is two pieces. I unbolted the 3 bolts that
hold the small bracket to the large bracket, and moved the bracket to
the front. Basically the front hole becomes the rear hole. Than I
drilled two holes the same size as the others and remounted the small
bracket in the forward pattern. I dont recall having to bend the arm
on the bottom, but the pulley should live up fine in this location. I
think the wiring details were on Bob Johnstone's, but the Honda alt
page has been redone, and my old GM alternator tech is now gone. Bob
you still have that somewhere? Here are pictures :
Tom
'63 Avanti, zinc plated drilled & slotted 03 Mustang Cobra 13" front disc/98 GT rear brakes, 03 Cobra 17" wheels, GM alt, 97 Z28 leather seats, soon: 97 Z28 T-56 6-spd, Ported heads w/SST full flow valves, 'R3' 276 cam, Edelbrock AFB Carb, GM HEI distributor, 8.8mm plug wires


 I took that plug from an old GM alternator that came off of an 85 Buick Regal.
 ], but the guy at NAPA told me it was and my friend Tom Covington also told me it was. Tom has one wire alternators on his Studebakers. Tom also told me that I needed that wire from the plug connected, but I still can't remember why.
Comment