In a previous thread Ron Dame asked about replacement Avanti rear quarter window seals. Matt B said the left side was available, I'll assume Stephen Allen as the source, but there are no right sides. I was lucky that when I removed mine years ago, I thought they looked terrible but I kept everything intact so I could have a guide on how new seals would need to be installed.
I was ready to install the windows last month, so I called Dan Booth to order new ones, no joy. Dan said they were sold out and he didn't foresee new ones anytime soon. What he did suggest, if I still had the old ones, was to sand any rough edges off to make them look smooth and reinstall what I had.
About the same time forum member WCP, Thanks bill, suggested that I be sure to shim the windows to assure a seal and then build up any gaps with foam.
So onward I pressed. The gasket actually sanded up quite nicely with 80 grit but still looked like crap visually as there was paint over spray and some discoloring from previous attempts by to PO to improve the looks of the car. I still had part of a can of SEM satin vinyl spray dye so I masked the window and sprayed the rubber with it. Looks like new. I have no idea how long it will last but for now it looks fine.
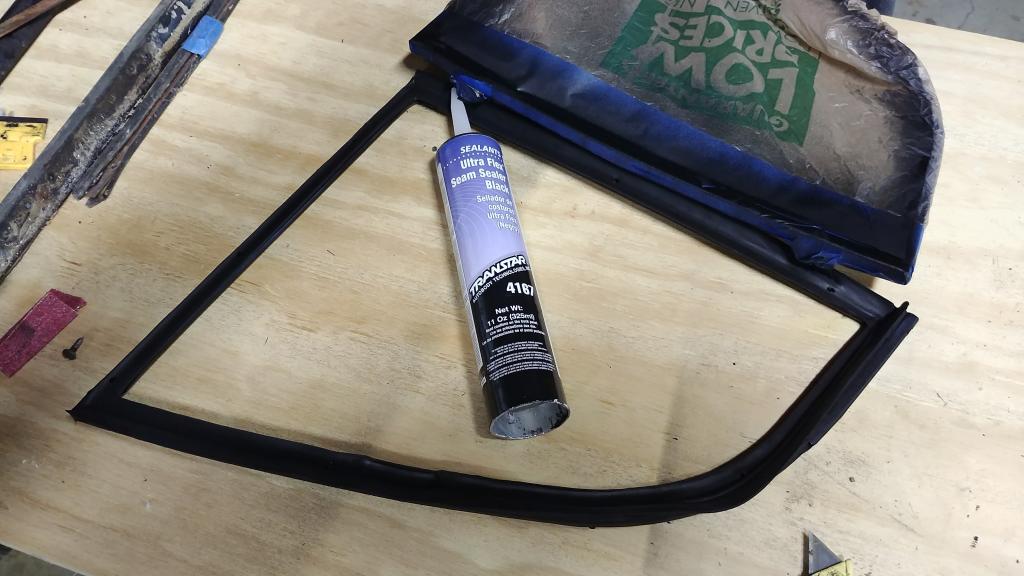
I installed the window and checked for seal with a one dollar bill all around the window. I must have been lucky as I couldn't pull it out anywhere so I removed the window assembly, used Transtar 4167 black sealer as a caulk and filler to reinstall the unit. I now have the window installed and you can't pull a dollar bill out anywhere.
A couple of words of caution: Tape and cover the body anywhere close to the window as the caulk sticks very well. The caulk will squeeze out and be sure to wipe it off level in the gaps quickly. Also tape any rubber surfaces where the caulk will squeeze out for the same reasons.
A last tip on cleaning the rubber and chrome/stainless parts. I scraped all the original caulk off I could but there was quite a bit of residual on a lot of the surfaces. After a few tests, I found that a small terry cloth rag soaked in paint thinner would take off all the residue. The residue needed to be kept wet for a small amount of time but it all came off to my amazement.
I don't have any before shots but here are several of the installed drivers side and the cleaned, sanded and dyed passenger side before installation.


Bob
I was ready to install the windows last month, so I called Dan Booth to order new ones, no joy. Dan said they were sold out and he didn't foresee new ones anytime soon. What he did suggest, if I still had the old ones, was to sand any rough edges off to make them look smooth and reinstall what I had.
About the same time forum member WCP, Thanks bill, suggested that I be sure to shim the windows to assure a seal and then build up any gaps with foam.
So onward I pressed. The gasket actually sanded up quite nicely with 80 grit but still looked like crap visually as there was paint over spray and some discoloring from previous attempts by to PO to improve the looks of the car. I still had part of a can of SEM satin vinyl spray dye so I masked the window and sprayed the rubber with it. Looks like new. I have no idea how long it will last but for now it looks fine.
I installed the window and checked for seal with a one dollar bill all around the window. I must have been lucky as I couldn't pull it out anywhere so I removed the window assembly, used Transtar 4167 black sealer as a caulk and filler to reinstall the unit. I now have the window installed and you can't pull a dollar bill out anywhere.
A couple of words of caution: Tape and cover the body anywhere close to the window as the caulk sticks very well. The caulk will squeeze out and be sure to wipe it off level in the gaps quickly. Also tape any rubber surfaces where the caulk will squeeze out for the same reasons.
A last tip on cleaning the rubber and chrome/stainless parts. I scraped all the original caulk off I could but there was quite a bit of residual on a lot of the surfaces. After a few tests, I found that a small terry cloth rag soaked in paint thinner would take off all the residue. The residue needed to be kept wet for a small amount of time but it all came off to my amazement.
I don't have any before shots but here are several of the installed drivers side and the cleaned, sanded and dyed passenger side before installation.
Bob

 Bob
Bob


Comment