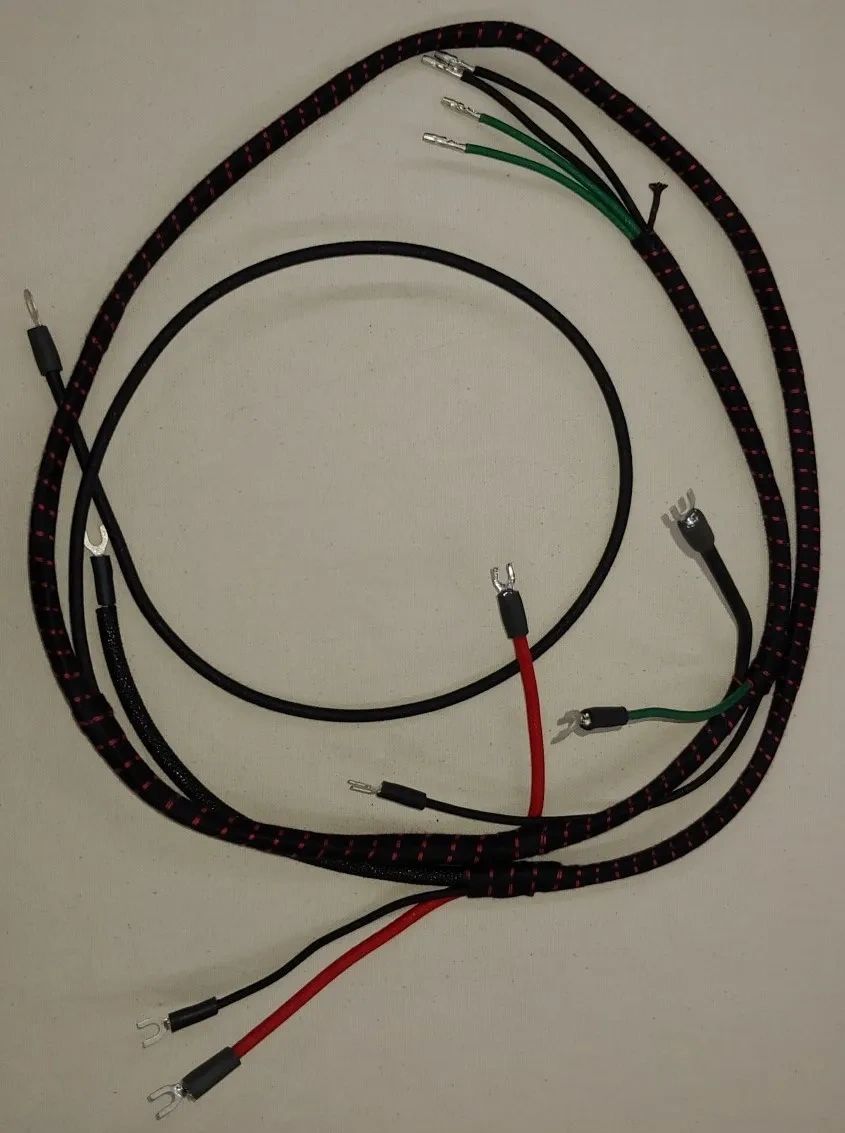
Hi, I recently purchased a 1948 Champion Regal Deluxe (4 Door). I'm in the process of - one, getting the thing cleaned out, because its very, very dirty. Its not poorly cared for, its simply dirty, because I think this car came from a farm location where there was a lot of red clay dust in the air. One of the dirtiest areas is the engine compartment. There is grease and muck all over and its all over the wiring harnesses. I've decided to redo as much of the wiring harnesses as possible to the extent that grime is visible and the wires need to be changed out. The one issue I ran into is these cars are all "cloth cover wire", which is VERY cool, but that presented the question of...what was the original wiring color scheme on these cars? My wires all fall into a range of what I believe must have been off-white or beige to wires that are black or dark grey. I don't see a lot of red or different colors other than the off-white and the black.
The actual re-wiring is not an issue for me. I'm an Electrical Engineer and I worked as a automotive electrician for many years, while working my way through college (yes...I'm from the days that kids worked so they could go to college). So, the electrical part is the easy part for me, but what is an issue is what color patterns were standard or typical in 1948? I want to remain as original as possible, so I don't want to go into the modern color sets. Nor do I want to use - say, yellow wires with purple tracers, which would be far from original. - Today, everything is plastic covered, so telling the color schemes is easy. We also have a lot of multiple colored wires with multiple tracer marking in today's cars. However, it doesn't seem that was the case back in 1948. Unfortunately, I never did much work (if any) on 1940s and 1950s cars...at least not that I can remember (the memory is the first thing to go... ).
).
If anyone has tackled a "harness rewiring" project and can share some advice on what color schemes were used back in the day, that would be great! I'm sure Studebacker had some standardized scheme, but as much as I've researched it, I can't seem to find anywhere where they call out the colors on the wiring.
Thanks for your help as always!
The actual re-wiring is not an issue for me. I'm an Electrical Engineer and I worked as a automotive electrician for many years, while working my way through college (yes...I'm from the days that kids worked so they could go to college). So, the electrical part is the easy part for me, but what is an issue is what color patterns were standard or typical in 1948? I want to remain as original as possible, so I don't want to go into the modern color sets. Nor do I want to use - say, yellow wires with purple tracers, which would be far from original. - Today, everything is plastic covered, so telling the color schemes is easy. We also have a lot of multiple colored wires with multiple tracer marking in today's cars. However, it doesn't seem that was the case back in 1948. Unfortunately, I never did much work (if any) on 1940s and 1950s cars...at least not that I can remember (the memory is the first thing to go...
).If anyone has tackled a "harness rewiring" project and can share some advice on what color schemes were used back in the day, that would be great! I'm sure Studebacker had some standardized scheme, but as much as I've researched it, I can't seem to find anywhere where they call out the colors on the wiring.
Thanks for your help as always!
 Problem solved!


Comment