Announcement

Collapse
No announcement yet.

anyone in Mpls/St.Paul area who can come over and give some tips on frame/body welding work?

Collapse
X
 
  • Filter
  • Time
  • Show
Clear All
new posts

  • anyone in Mpls/St.Paul area who can come over and give some tips on frame/body welding work?

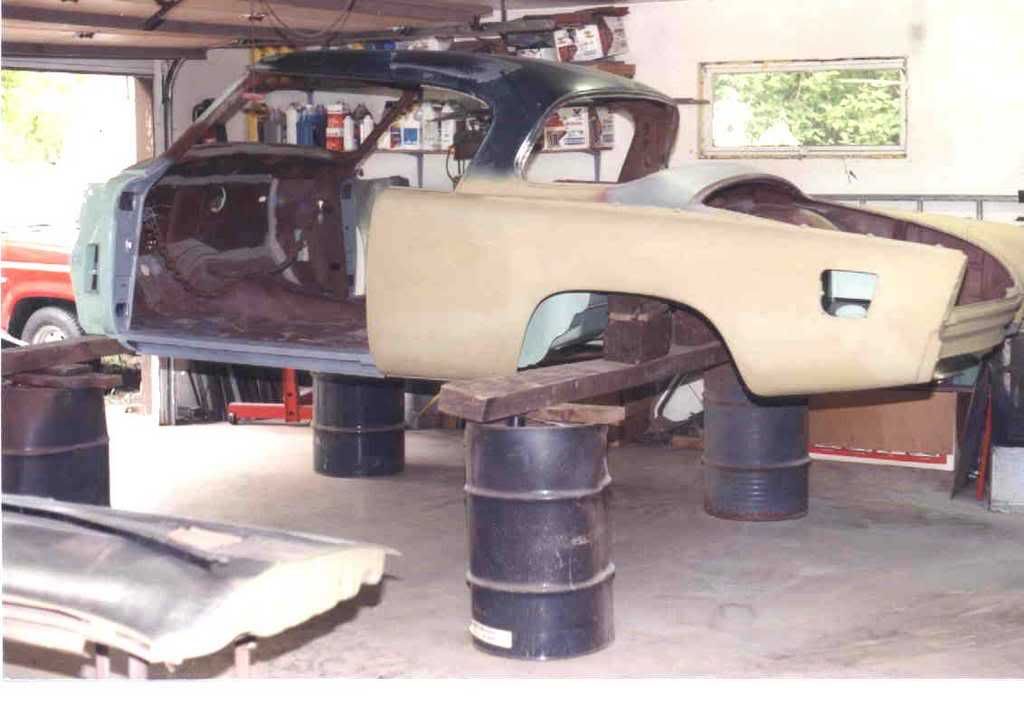
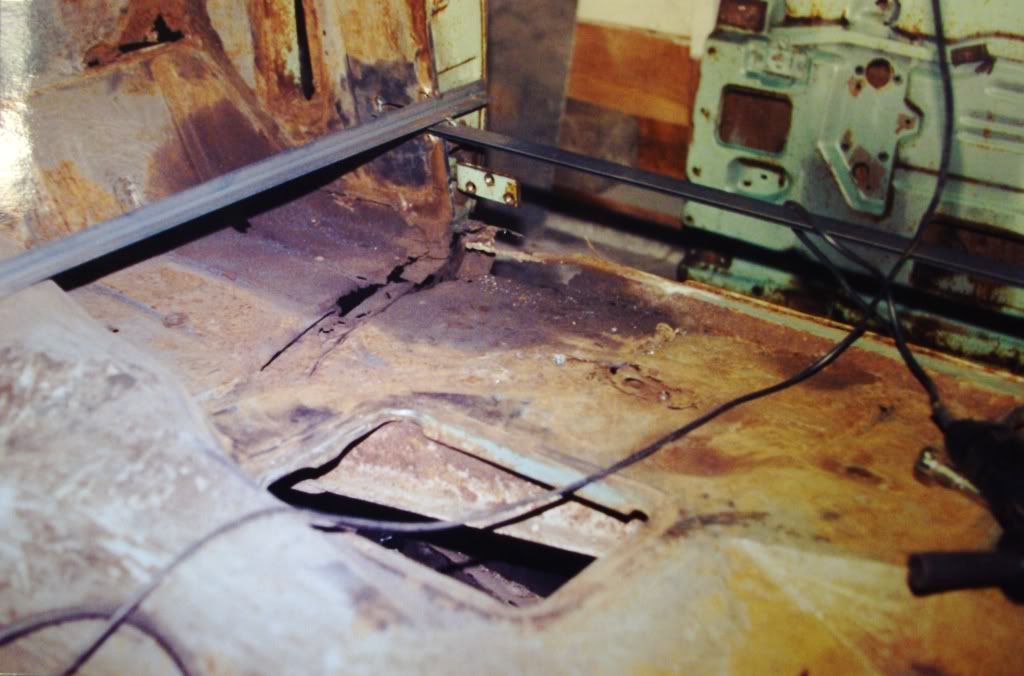
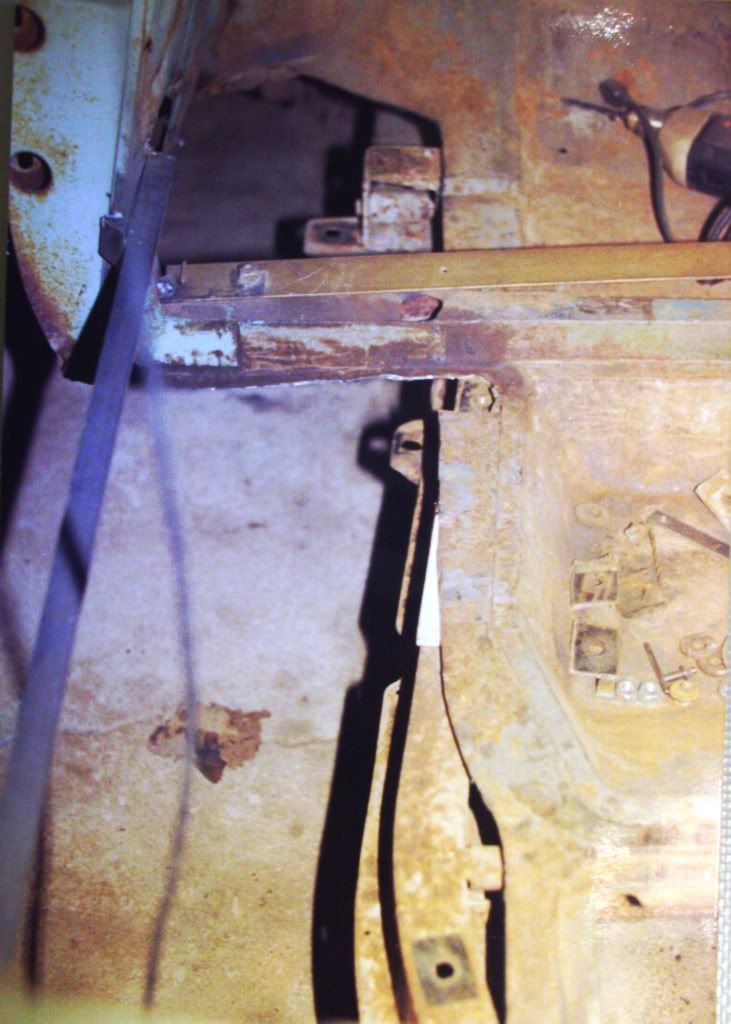
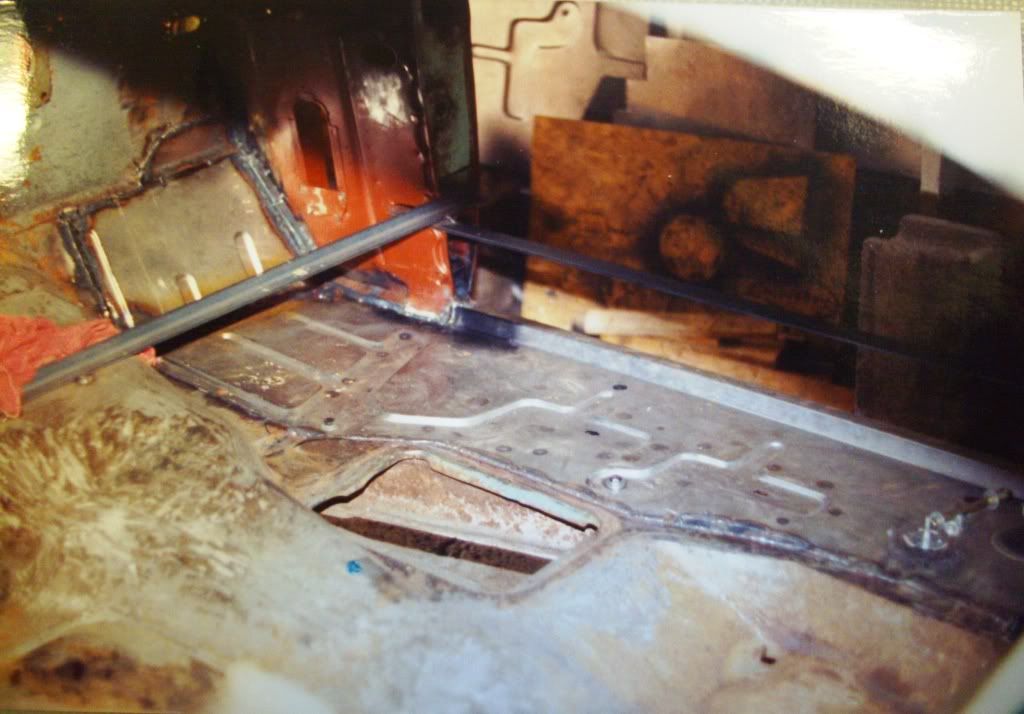
    I'm at a stand-still on how to proceed with the '57 Golden Hawk project. Need to put some sheet metal in before we take the body off the chassis, but the doors have just a little sag, the floor pans have rotted out in the front, and unfortunately the holes are right next to the door pillars. Of course the rockers are rotted out and need replacing (the rest of the body is really pretty solid!
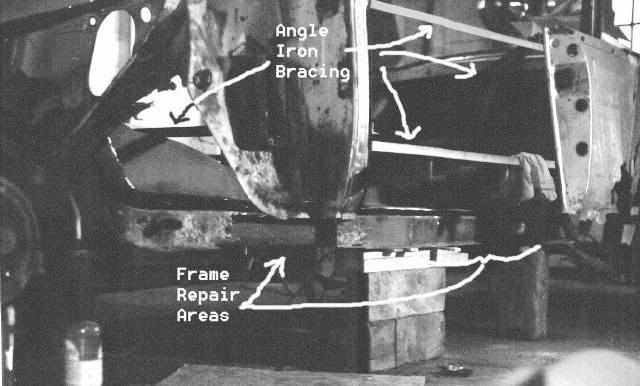
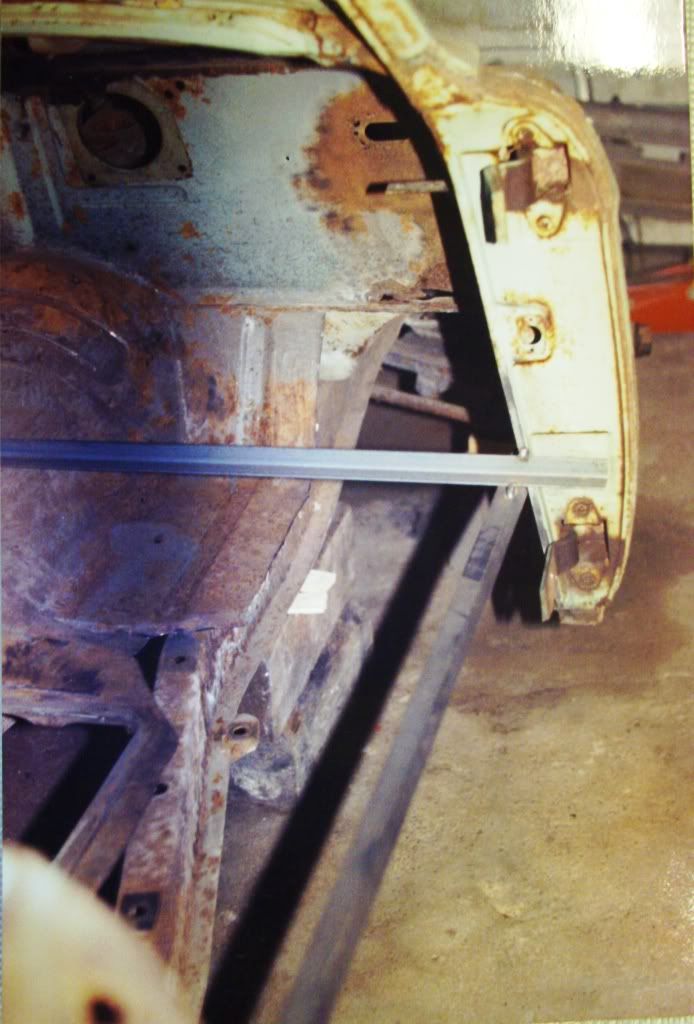
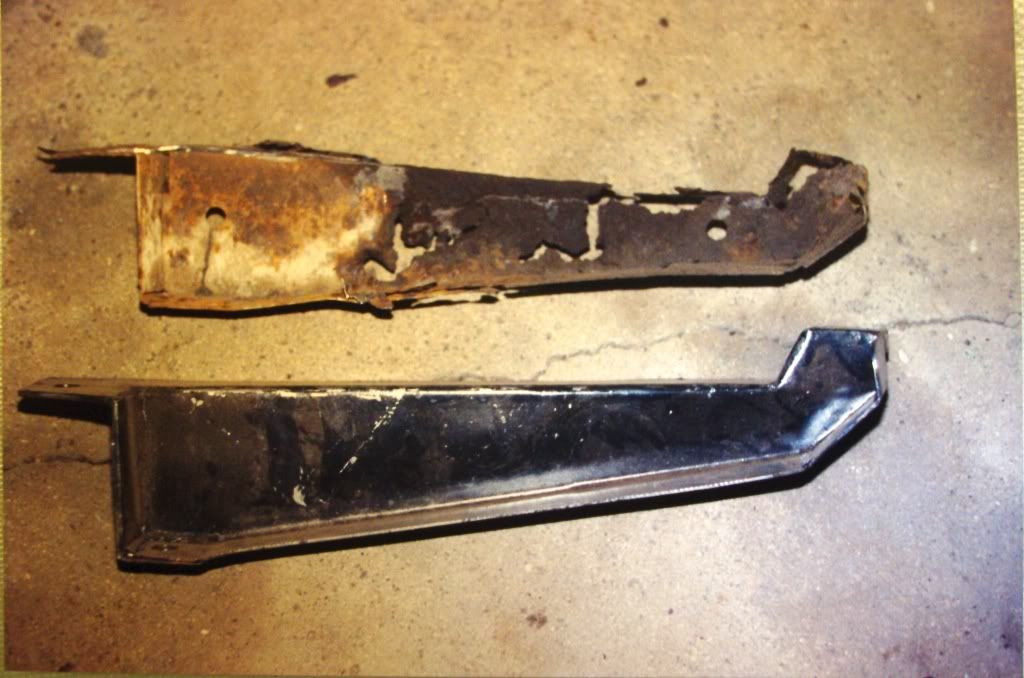
    So, my problem is I'm not sure where to start, where to jack up the frame (or how much), how to go about cutting out the rockers and floor pans while maintaining squareness. Have had advice from this forum suggesting welding angle-irons across the door opening, but would sure be nice if someone who had done this with a hardtop and is in the area (I'm by Stillwater/Lake Elmo) could come out some evening or weekend and give me some first-hand tips after looking it over. I just bought myself a wire-feed welder and figured I would do as much as I can myself (after practicing a good deal on a beat-up deck-lid of the same gauge steel!) But I'm very unsure about where to try and compensate for sag by pushing something the 'other way', vs just keeping things "as they are" with cross-bracing while welding in the new rockers and floor pans patches, and trying to square things up later when I put the body back on the frame (new rubber donuts and such I assume will make some difference too). I'm also thinking I might need to replace at least one of the front body support arms (cantilevered off the frame), and this seems it could affect the doors too, if that is the sag point? Not sure if there is adjustment in the hinges where you can compensate for sag (or for inaccurate welding of the new rockers!?). Lot easier to talk it over with someone while standing and looking at it!

  • #2
    Hi Barry,

    The North Star Wheel will deadline of the next issue is coming up October 20th. Contact Bob Stude, editor and have him put your request in the newsletter. Bob's email addy is in your newsletter. There are many helpful North Star Chapter members right near you and they read the newsletter more than they read the Forum here. Just a thought.
    Henry Votel,
    Forest Lake, MN
    Buying & Selling Studebaker Parts in MN & WI

    Comment


    • #3
      that is a good idea Henry, thanks. I just sent him a 'want ad', but never thought about this. Will do.

      Comment


      • #4
        Make sure to take some pictures of the project. That would make a great article for Turning Wheels.

        Comment


        • #5
          I've posted this photo before:


          This shows where I braced up the body on the '53 (same shell as your GH). 1 angle iron across the transmission tunnel going side to side (tack welded to the tunnel in the center) to keep the A posts from swinging in/out, 2 more across the door opening at top and bottom to keep that square, and then a 3rd one (barely visible) going from the top of the non-existant B piller area angling down to the center floor brace to keep that from tilting in/out.

          Here you see that I had the floors cut out from the toe board all the way to the back under the rear seat. The body floor braces (all 3 of them), the hog troughs, and rockers are also gone. All that was holding the left side of the body shell up here is the firewall brace and the trunk except for some wood shims I had placed under the cut edge of the floor.

          I only worked on one side of the car at a time and did not attempt to separate body and frame. You'll note in this picture I've cut out a couple of huge sections (one already repaired) of the frame too! Neither the body or the frame seemed to be sound by themselves so I repaired each "in-situ" and only separated them later. By limiting how much I cut out at any one time I was hoping nothing would move around.

          I welded the bracing in first before doing any cutting of rusted floors or frame. In this picture the wheels are off, the front clip was off, the body shell was stripped bare, and the drivetrain was out of the car so there was no extra weight to "warp" the frame. I then had those blocks and wedges to support the frame from moving when I cut out the bad spots.

          Believe me, I was quite worried that something would move then I would later be in trouble when putting it back together. The frame patching was the most "scary".

          If your doors are sagged, I'd first make sure its not the hinges are worn. If they are loose and you cannot see the A pillar move when you lift up on the door then odds are THAT has not moved and you could tack your bracing to it and proceed to remove the doors and then work on the floors. Deal with the hinges later. If the A pillar is moving and the hinges are tight, I'd hope that nobody has attempted to adjust the hinges and they are in their original locations. Then, I'd leave the doors on and make sure they fit "square" in the body first. Then arrange to brace the body to hold the A piller in place so the doors are fitting. After that they can come off and then the floor repairs.

          In the case of my car, it was really rusty but there was enough left that nothing had appeared to have moved out of place so I took off the doors and then put in the braces.

          This later picture (about 4 yrs later) shows the body separated from the frame. The rocker panels were the last part to go back on after the doors. I've had no end of problems with those and getting the fit to the door bottom so the weatherstrip is fitting/working. They are pretty good now though.


          One of these days I should go through all my old negatives from the 90s when I did this and scan them so I could make a step by step of how I did all this. BTW, this was my first body off (and maybe my last!) and it turned out OK despite it all. Just take your time.

          Jeff in ND

          Comment


          • #6
            thanks Jeff! Very helpful to 'see' the bracing. Question; any reason you left the rockers until much later?? I was planning on welding in the new rockers and the floor patch panels while the door-opening is braced, and be done with it.... (before I take the body off)
            Fortunately, my frame is solid, and the only rust problem is right along the rockers horizontally, and the rear of the front fenders, vertically.

            Comment


            • #7
              I'm not well versed in the subject like Jeff, but I believe you would want to wait to do the rockers so that you can get the
              door/sill gap right at the bottom. Without having the doors on first as a reference point, it would be a guessing game.

              Joe D.

              Comment


              • #8
                any reason you left the rockers until much later??
                I believe you would want to wait to do the rockers so that you can get the
                door/sill gap right at the bottom. Without having the doors on first as a reference point, it would be a guessing game.
                Exactly. What made it worse for me is the reproduction floors don't have a curved door sill. The body is actually curved along the sides and this means the doors and rockers have a slight arc to them. The sill rib under the door that the rocker was welded to is also in a arc. But, the reproduction ones are straight. Also, I had to make my own torque boxes (aka hog troughs) and those were not exactly the same (or curved) compared to the original ones. The new rockers are curved but they don't fit up to the door sill except the ends. All that, and the problems I had with the driver side door fitting to the rear fender at the lower rear corner mean't that those rockers were best left until everything else was fitted as best as possible. I used screws (under the weatherstrip) along with "calibrated" washer stacks to position the rockers to get the gap on the door bottom right so the weatherstrip seals properly. I've had the driver side one loose to refit about 3-4 times since the car was "done" to make improvements after messing with the door fit. I am pretty sure my car at least now has better panel fit than new, although it sure is not "awesome".

                There is another forum member, Bill Clark (I think) who redid a '55 speedster and did a top notch job in recreating the torque boxes, etc from scratch. I've seen his photo gallery showing the floor replacement and the new boxes but don't have a link.

                Jeff in ND

                Comment


                • #9
                  ok, I think I understand. My 'torque boxes' are very solid, and I hope to be able to salvage the "sill ribs" (under the rockers?), so if the replacement rockers are curved, maybe I'll be ok. Thanks for the heads-up!! Lots of things to consider.

                  Comment


                  • #10
                    "sill ribs" (under the rockers?)
                    Sorry, poor choice of words.

                    Attached a sketch of the rocker panel and roughly how it relates to the floor and the torque box. The door sill part of the floor reminds me of a "rib" on a metal building (pole barn) roof panel and that is why I was calling it that. Its really just the edge of the floor.

                    Your hawk is a K so it has the torque boxes. A C body car doesn't have them so the bottom edge/flange of the rocker is just hanging in the open and that vertical panel is not there.

                    If the door sill area of the floor is original and solid as well as the torque box, it should all be curved properly. I'd still probably leave the final welding of that rocker until after the doors are on and aligned though.
                    Attached Files

                    Jeff in ND

                    Comment


                    • #11
                      great sketch! thanks

                      Comment


                      • #12
                        I cheated and took a couple digital pictures of some old photos rather than spend the time to find the negatives.... A little cropping and enhancing and they don't look too bad.

                        Here are a couple more pictures of the A post bracing when I did the floors on my '53 in the winter of 1995.

                        Before cutting the floor and body supports out:


                        The A post is "hanging in the wind":


                        The B post is also "hanging". See the wide angle iron (a old bed rail I found) going up to the right to help support things. That is the front end of the rear spring and mount on the frame you can see in the top of the picture.


                        After the floor is welded in:


                        I don't really have any decent photos of the new body brace under the floor or the torque box due to the poor angles and bad lighting under there at the time. However, this picture shows the new "A" brace laying next to the old rusted out one.

                        Last edited by Jeff_H; 10-25-2010, 05:45 AM.

                        Jeff in ND

                        Comment

                        Working...
                        X