Whoever it was that said this will take longer than I thought - you were right 
I started out double checking my labels on the new Studebakers West wiring harness and found a few I'd gotten wrong. I also realized that I'd have to pull the harness through the firewall from the passenger compartment, so had to take off the new grommet I'd painstakingly slid on already [xx(]

I decided to pull the gauge cluster instead of pulling the entire dash, which will also enable me to put in the nice new cluster surround I picked up (I know, too shiny for a Standard, but what the hey).

I went out and photographed every wire on the car, starting with the alternator and ending with the heater leads, then went back and took video of the whole harness and narrated colors and stuff as I went.
To get to the cluster surround I pulled the stupid Grant steering wheel off and found out why the horn didn't work: about a foot of tiny wire wound up in the cancel cam. Sure hope the horn wire is still in the column...

The gauges were already out so I removed the surround next. The six screws that hold it to the dash structure came out fine working through the gauge holes with a mini-ratchet, but the two screws down by the steering column took me by surprise. Once those were removed, the surround was free to slide out.

Now I saw the full extent of the crapulence that was my wiring. I knew there'd been a horn-wire meltdown, but didn't know how bad it was. I found multiple power taps off of factory circuits, including the main wire to the ammeter, that led nowhere. The leads to the high-beam headlights had been just nipped off, and the low-beam circuit tied to the parking light circuit with a 15-amp fuse spliced into the lead. The fuse/flasher panel was broken, with one fuse holding together the busted ends of the board. Luckily I'd known about this and ordered a new one from SASCO about a month ago.
And there was sand everywhere - behind the steering wheel, on top of the column support, inside the gauge pod. I think someone parked the car at the beach in a windstorm and left the cowl vent open. Lots of surface rust under there, too - the turn signal flasher was rusted to its connectors!
At this point I spent some time documenting the wires that went to fuse/flasher board, since my wiring diagram wasn't all that clear. Finally it was time to nip the old harness at the firewall.

Cutting into the bundle one wire at a time, I felt really glad that I'd decided to do this bit of business before putting Barney back on the road, because the horn wire meltdown had apparently scorched a few others, including the big wire from the alternator to the ammeter [:0]
7 hours after I started, I was able to pull the rat's nest out of the dashboard and tape the firewall hole. I'm sore, but I'm glad I did it, and I think the back half will be pretty easy. Hope so, anyway!

If you've read all this, I have a couple of questions
1) The headlight breaker and the wiper breaker are both 15-amp units, which seems fine for the wiper motor but way too small for a 4-lamp headlight system. What should I replace these with?
2) The old harness' firewall grommet was cut to keep from having to slide it over the entire wiring bundle. Did the factory do this, or was that some PO's cheap way out?
[img=left]http://members.cox.net/clarknovak/lark.gif[/img=left]
Clark in San Diego
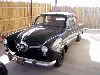
'63 F2/Lark Standard
I started out double checking my labels on the new Studebakers West wiring harness and found a few I'd gotten wrong. I also realized that I'd have to pull the harness through the firewall from the passenger compartment, so had to take off the new grommet I'd painstakingly slid on already [xx(]
I decided to pull the gauge cluster instead of pulling the entire dash, which will also enable me to put in the nice new cluster surround I picked up (I know, too shiny for a Standard, but what the hey).
I went out and photographed every wire on the car, starting with the alternator and ending with the heater leads, then went back and took video of the whole harness and narrated colors and stuff as I went.
To get to the cluster surround I pulled the stupid Grant steering wheel off and found out why the horn didn't work: about a foot of tiny wire wound up in the cancel cam. Sure hope the horn wire is still in the column...
The gauges were already out so I removed the surround next. The six screws that hold it to the dash structure came out fine working through the gauge holes with a mini-ratchet, but the two screws down by the steering column took me by surprise. Once those were removed, the surround was free to slide out.
Now I saw the full extent of the crapulence that was my wiring. I knew there'd been a horn-wire meltdown, but didn't know how bad it was. I found multiple power taps off of factory circuits, including the main wire to the ammeter, that led nowhere. The leads to the high-beam headlights had been just nipped off, and the low-beam circuit tied to the parking light circuit with a 15-amp fuse spliced into the lead. The fuse/flasher panel was broken, with one fuse holding together the busted ends of the board. Luckily I'd known about this and ordered a new one from SASCO about a month ago.
And there was sand everywhere - behind the steering wheel, on top of the column support, inside the gauge pod. I think someone parked the car at the beach in a windstorm and left the cowl vent open. Lots of surface rust under there, too - the turn signal flasher was rusted to its connectors!
At this point I spent some time documenting the wires that went to fuse/flasher board, since my wiring diagram wasn't all that clear. Finally it was time to nip the old harness at the firewall.
Cutting into the bundle one wire at a time, I felt really glad that I'd decided to do this bit of business before putting Barney back on the road, because the horn wire meltdown had apparently scorched a few others, including the big wire from the alternator to the ammeter [:0]
7 hours after I started, I was able to pull the rat's nest out of the dashboard and tape the firewall hole. I'm sore, but I'm glad I did it, and I think the back half will be pretty easy. Hope so, anyway!
If you've read all this, I have a couple of questions
1) The headlight breaker and the wiper breaker are both 15-amp units, which seems fine for the wiper motor but way too small for a 4-lamp headlight system. What should I replace these with?
2) The old harness' firewall grommet was cut to keep from having to slide it over the entire wiring bundle. Did the factory do this, or was that some PO's cheap way out?
[img=left]http://members.cox.net/clarknovak/lark.gif[/img=left]
Clark in San Diego
'63 F2/Lark Standard


 )]
)]

Comment